Think for a moment about the types of documents you typically send as an attachment. These are static documents that don't change every time you send them. In the United States, this might be your W-9. Some other examples might be an insurance certificate, a contract rider, a flyer, or posters for print. There are many cases where you might want to attach a document to an email every time it’s sent, and that’s why Mago supports attachments in templates.
Once you’ve created an email template, and saved it, you will see a new panel on the right. If you don’t see this attachments panel, it’s because you haven’t saved your email template and will need to do that before proceeding.
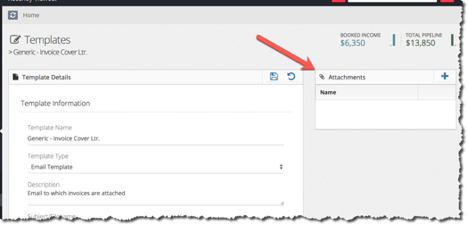
Add an attachment by clicking on the “add” icon (plus sign). This will take you to your file manager. If you're not familiar with the file manager, check out this article. You will usually find your documents in the “documents” folder (#1 in the picture here)
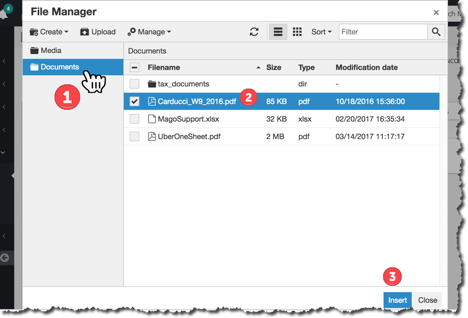
Next you’ll select a document to attach (#2 in the picture). If the document that you need is not on the list in the Mago file manager, you will need to upload it.
Click “insert” (#3 in the picture)
If you want to remove an email from the attachments, click the "remove" icon (x).
Once you’re happy with your attachment list, click the save icon.