The real power of a tool like Mago is the ability to automate your responses and quickly and easily merge your contact's specific details into a template so you don't have do any more tedious copy and paste emails and hope you remember to fill in all the blanks.
With that in mind, the ability to create a virtually unlimited number of templates to suit any situation is the backbone of Mago. When you create your account, you are presented with a number of sample templates that you can use as-is, tweak to suit your needs, or use as inspiration to create new templates that are all your own. You're limited only by your own creativity.
Let's get started building a new template!
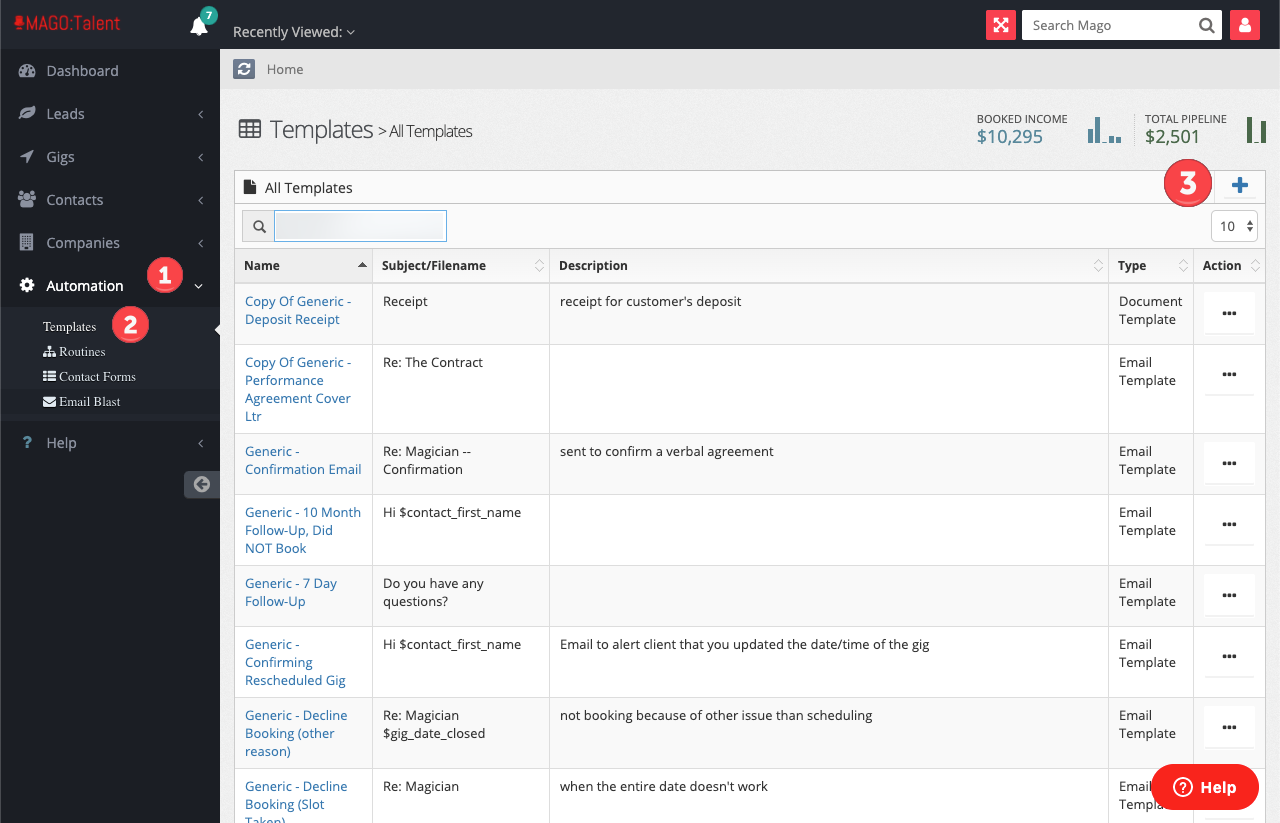
Go to the main navigation menu on the left side of the screen and select "automation" and then select "templates" from the drop-down menu. You'll be presented with a list of all the templates currently saved in your account. Click the plus sign in the upper right corner of the box to create a new one.
Clicking the plus sign opens the new template page. There there are some fields for you to fill out. Let's break those down.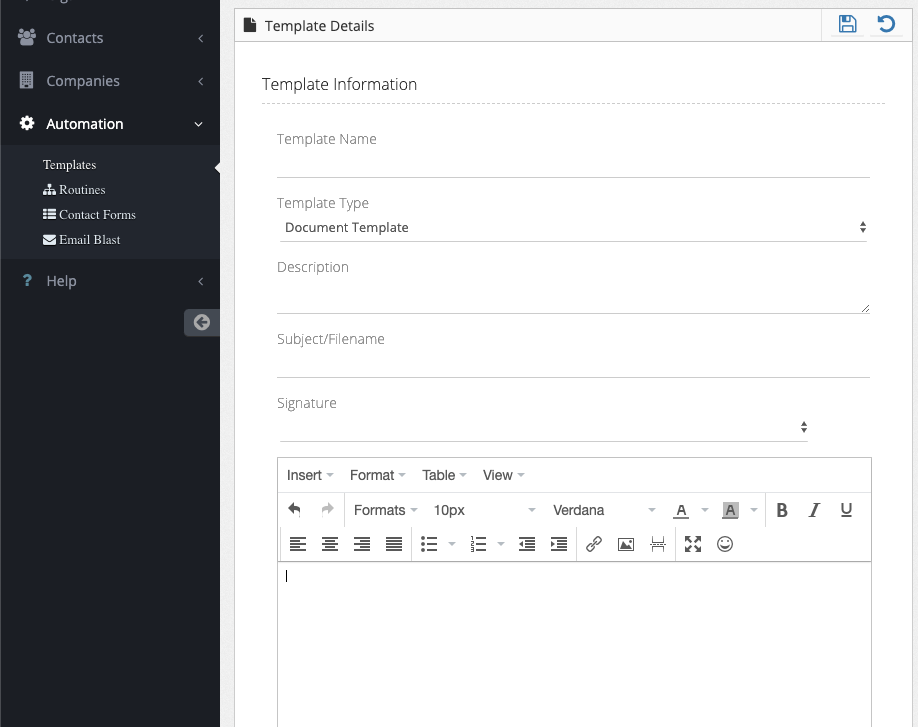
Template Name - Use this field to give your template a name. Make it short but descriptive enough that you'll have an idea what this template is when you're looking at the list of all of your templates. The template name is not displayed to recipients.
Template Type - Mago allows you to create two different types of templates - email templates and document templates. In short, email templates are for sending emails with specific data from your records merged in. Document templates are for documents you want to send with specific data merged in. An example of an email template would be a note to a contact thanking them for having you at their event. An example of a document template would be an invoice, a contract, or a receipt. This field defaults to the document template type. To change the template type, click on the field and select the desired type from the menu.
Description - Whatever you put in this field will be displayed on your template list to help you know, at a glance, what this template is for. It's just for your information, and is not displayed to recipients. You can leave this blank if you think the template name is descriptive enough.
Subject/Filename - If you are using an email template, what you put in this field will appear in the subject line of the email your contact receives. For example, if this is going to be a template for a thank you email, you might want something like "What a show!" or "Thanks for having us!". If you are making a document template, this will be the filename of the document.
Signature - This is where you will pick the signature used, if you want one. If you haven't set up your signatures yet, check out this video. When you've selected the signature you want, it will appear in the text editor so you can see that it's there and how it looks with everything else. Whatever you select here does NOT change the "from" address. That is done when you actually go to send the email. So if you have multiple email addresses, selecting a signature in this step will not make it so the email is sent from that particular email address unless you select the correct one when you actually send the email.
Text Editor - Last you'll find a pretty standard text editor. Enter your text here, and use the "insert" tab to insert merge fields. This article goes into a little more depth about using merge fields. Keep your merge fields simple for templates you use early in the process or ones that you use widely. It sometimes happens that you won't have fully complete information on your contact right away, in which case the merge field will appear blank in your final document/email. For example if you use a field that pulls in the guest of honor's name, and you don't have that filled in, it will be blank and unprofessional looking.
Keep going until you're happy with it, then click the little "save" icon at the top of the page.
Now you're ready to use your new template!